Sunday, April 28, 2019

2018 summery

We moved to Burlington Vermont in 2018.  Paddling opportunities abound.  There are 60+ miles of Lake Champlain with a wide variety of paddling conditions (wide, narrow, sandy beaches, rocky beaches, cliffs, islands) plus rivers and smaller lakes and ponds.  It will take a long time to check it all out.

A flat day on the lake.


Leddy Beach


Champlain kayakers
Winooski River


Lake Champlain Bridge at the south end of the lake seen from the NY shore.


Grumpy osprey complaining as we went back up Otter Creek to our launch site.
I had a lovely time checking out the many different sections of Lake Champlain as well as some of the rivers that feed into it.

Monday, January 8, 2018

Summer-izing the 2017 paddling season

It's been below freezing for weeks.  There's more than a foot of snow on the ground.  The water is rock hard for miles around.  Paddling season is definitely over.  This is a good time to look back over the summer's paddling adventures.

Learning about this boat has been adventurous. 

The literature says that baidarkas are tippy and fast.  Tippy?  Yep, that's for sure.  I had made the center more flat-bottomed than called for ('cause I am more flat-bottomed than the typical skinny paddler).  Thought that might make it more stable.  Nope.


My first trip out was on smooth water yet I was mostly bracing and barely paddling.  Finally I pulled up to a moored boat and hung on while hauling the foam block out from under my butt.  That dropped my center of gravity  low enough that I could mostly paddle and only brace a little.


Sure is pretty.  The durable plastic skin about doubles the weight of the boat though.  Not a problem in the water.  It is easy to get up to speed and has enough volume to carry anything I care to toss in.  However it's heavy to carry and to toss on the car.  Someday when I need to re-skin it I think I'll go to a light nylon or something. 


For now I'm enjoying having a transparent boat.  Actually, the best part is when I've put the boat on my shoulders to carry to or from the car.  That puts my head in the cockpit like a giant hat.  With any other boat, all I can see is my feet and a bit of the road ahead.  With this boat I can look right through the hull and get a clear view of where I'm going!


Fast?  Oh yes.  Between the 19 1/2 foot length and the smooth skin, I can boost up to 6+ mph.  Makes it to cover lots of distance. 

Also, in waves it is just amazing.  Dry, fast into, across and with the waves.  It catches and rides waves and wakes like nothing else I've ever paddled.  Strangely enough, the boat is much more stable in big waves.  I think the waves support the v-shaped hull making it less tippy. 

I don't have any pictures of paddling in waves.  I can see the appeal of a head-mounted camera.  No way I can get out my camera out of the dry bag to take pictures while riding breaking ocean waves! 


Initially I had a problem with going fast.  At top speed it was directionally unstable.  I'd cruise for a bit and then suddenly the boat would veer off and neither a steering stroke nor one-sided paddling would help until it slowed down.  Strangely enough, it tracked better in rough water than smooth.


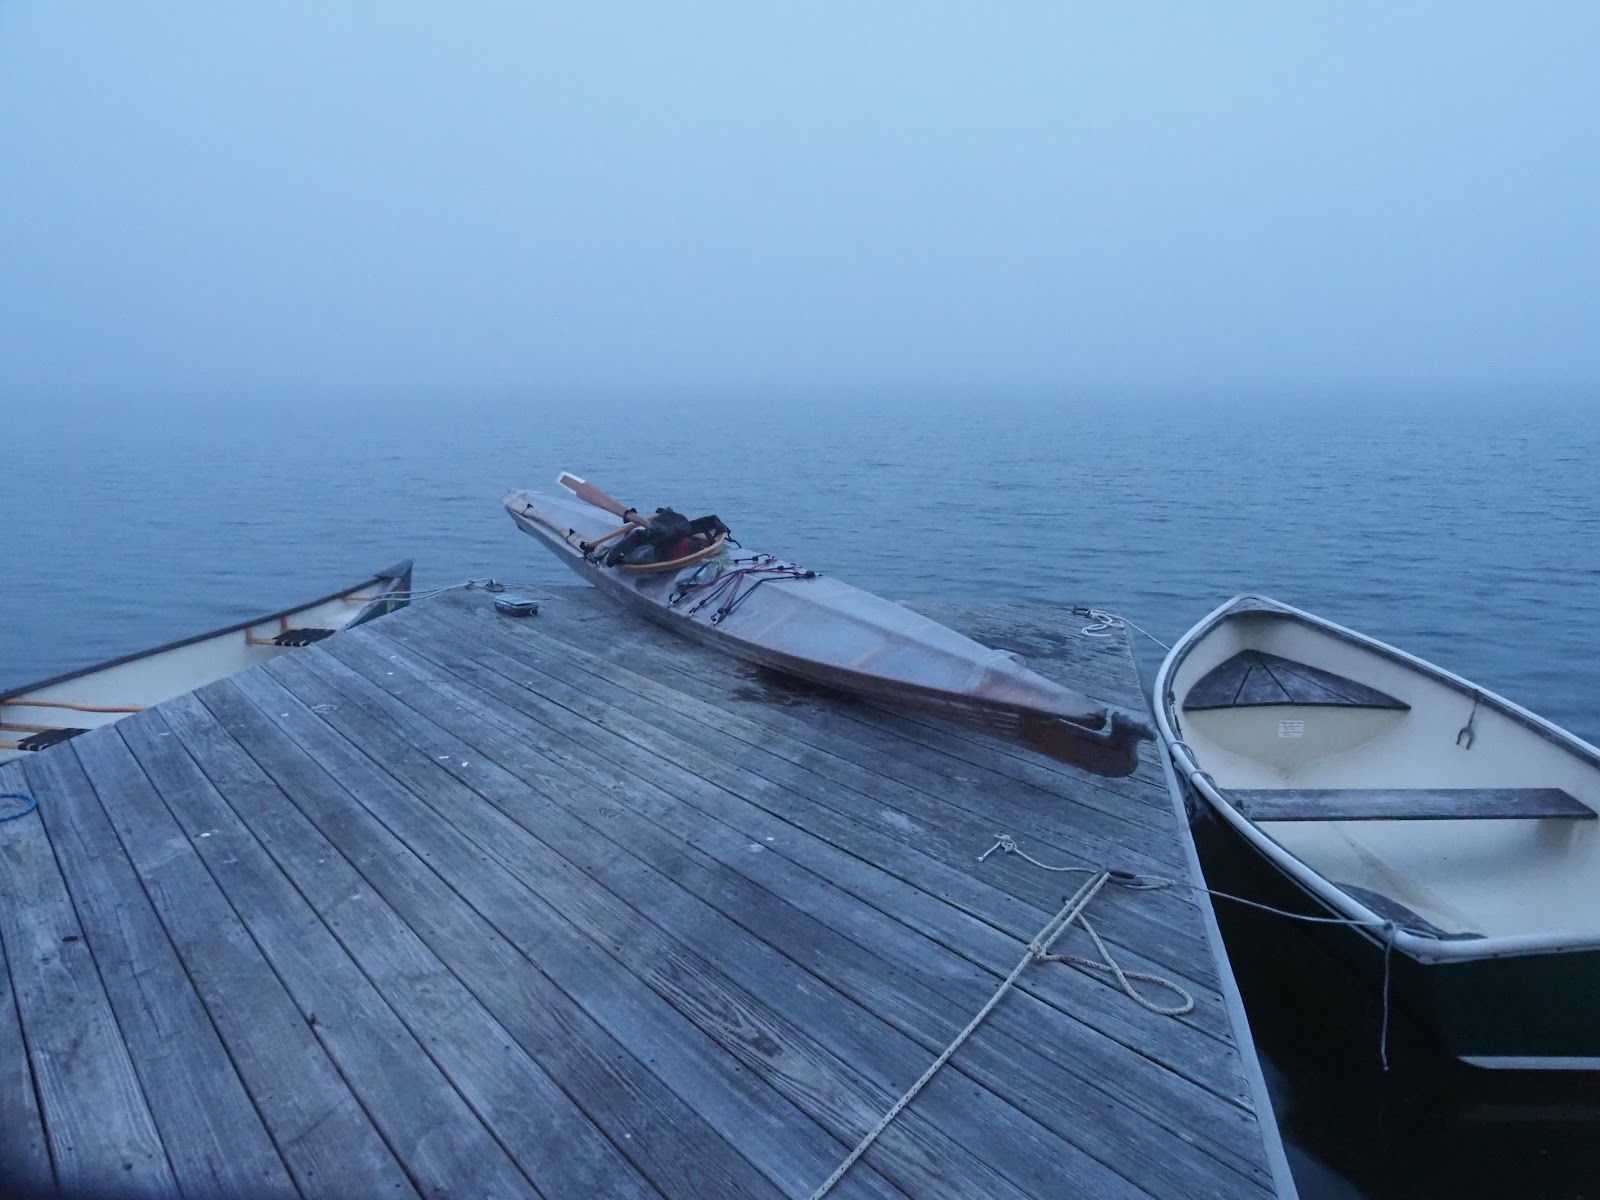
Looking at this picture of the boat floating in the water you can see that the stern on the right is high out of the water.

When I lashed up the stern the boat was upside down on saw horses.  The boat is flexible and apparently it drooped.  When I lashed the stern I locked in the droop, making it curl upward when right side up.

This might not matter if I'd left the cockpit further aft.  But with my weight centered the stern was barely in the water and failed to provide tracking. 


Deep sigh - I had to slice open the top deck skin on the stern (straight lines) so I could cut the lashings holding the stern plate (looks like a fixed rudder) and let the boat straighten.  Then I cut a fiddly shaped block (circled) to fill the new space between the stern plate and the rest of the boat.  Then I lashed all the parts back up and glued up the skin.


Oh yeah, that looks better! 

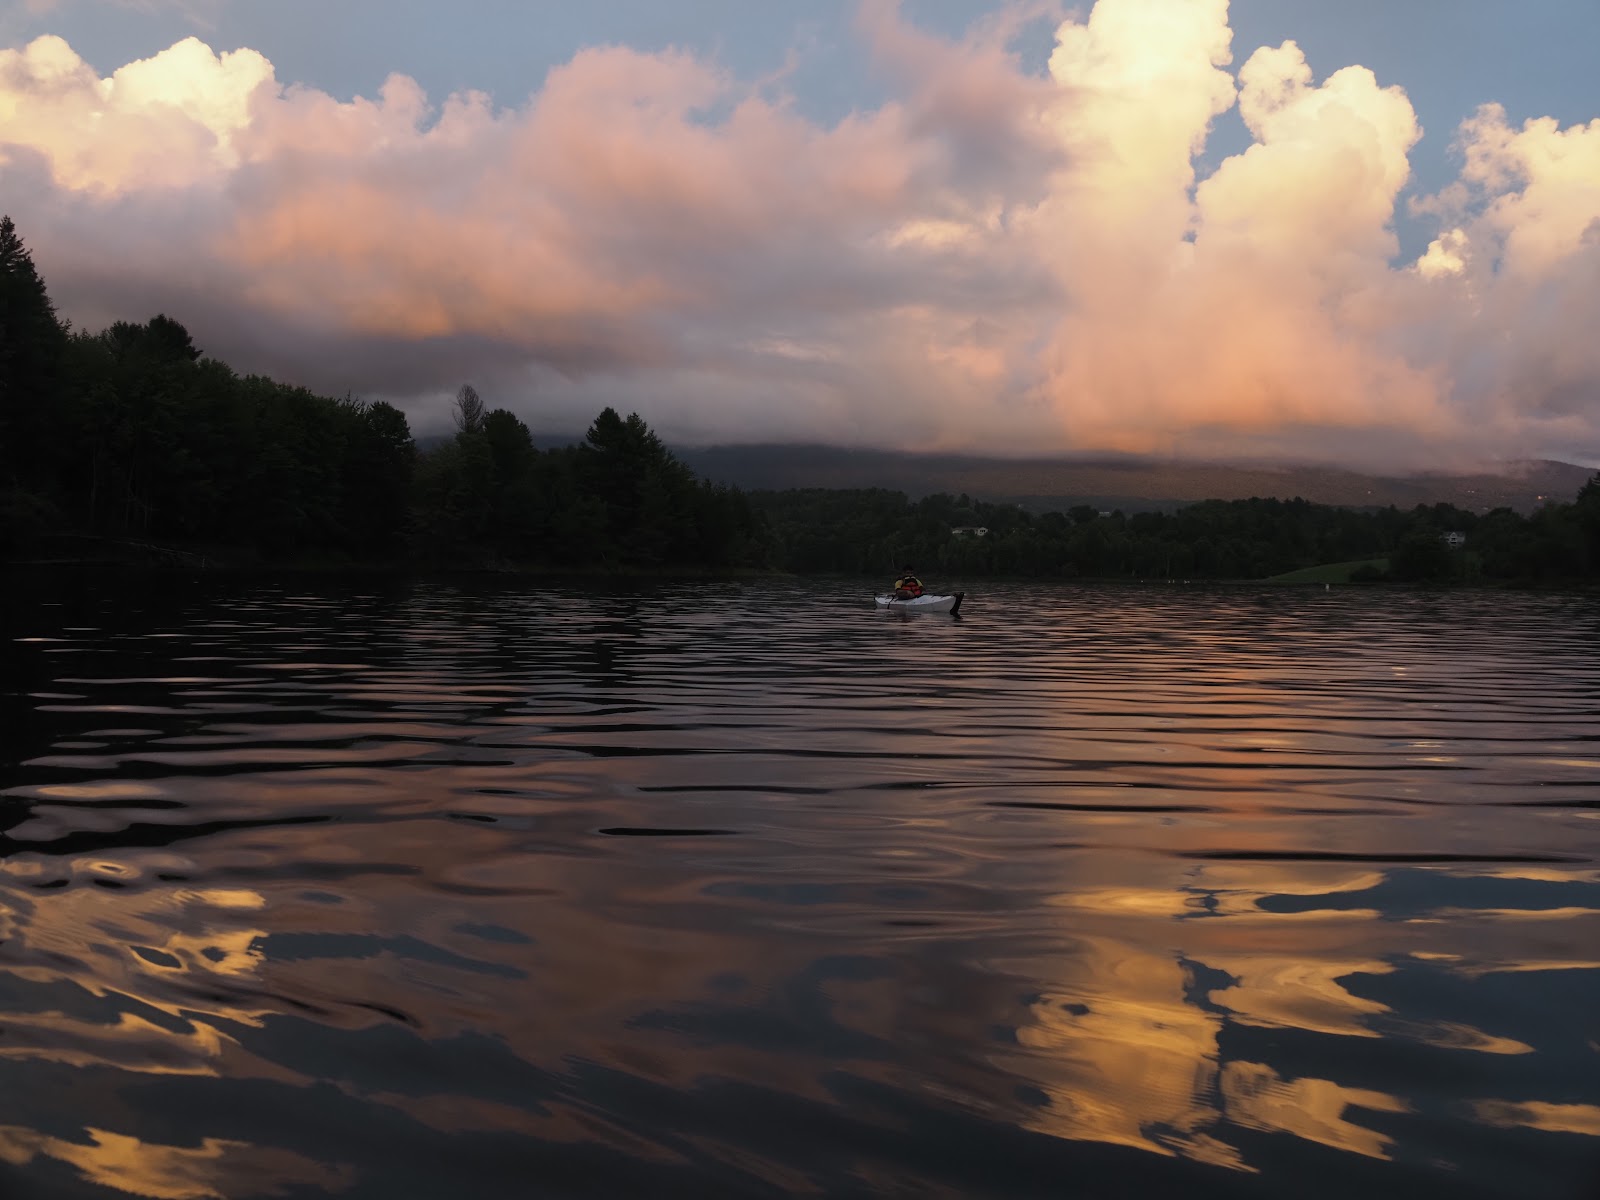
The difference in performance is dramatic.  Osprey is fast AND tracks!  Hot diggity I can just go and go and go! 


The high sloped deck sheds waves.  The tall cockpit coaming keeps out the splashes.  After years of low-volume Greenland paddling through, rather than over, the water this staying dry thing is novel and delightful.

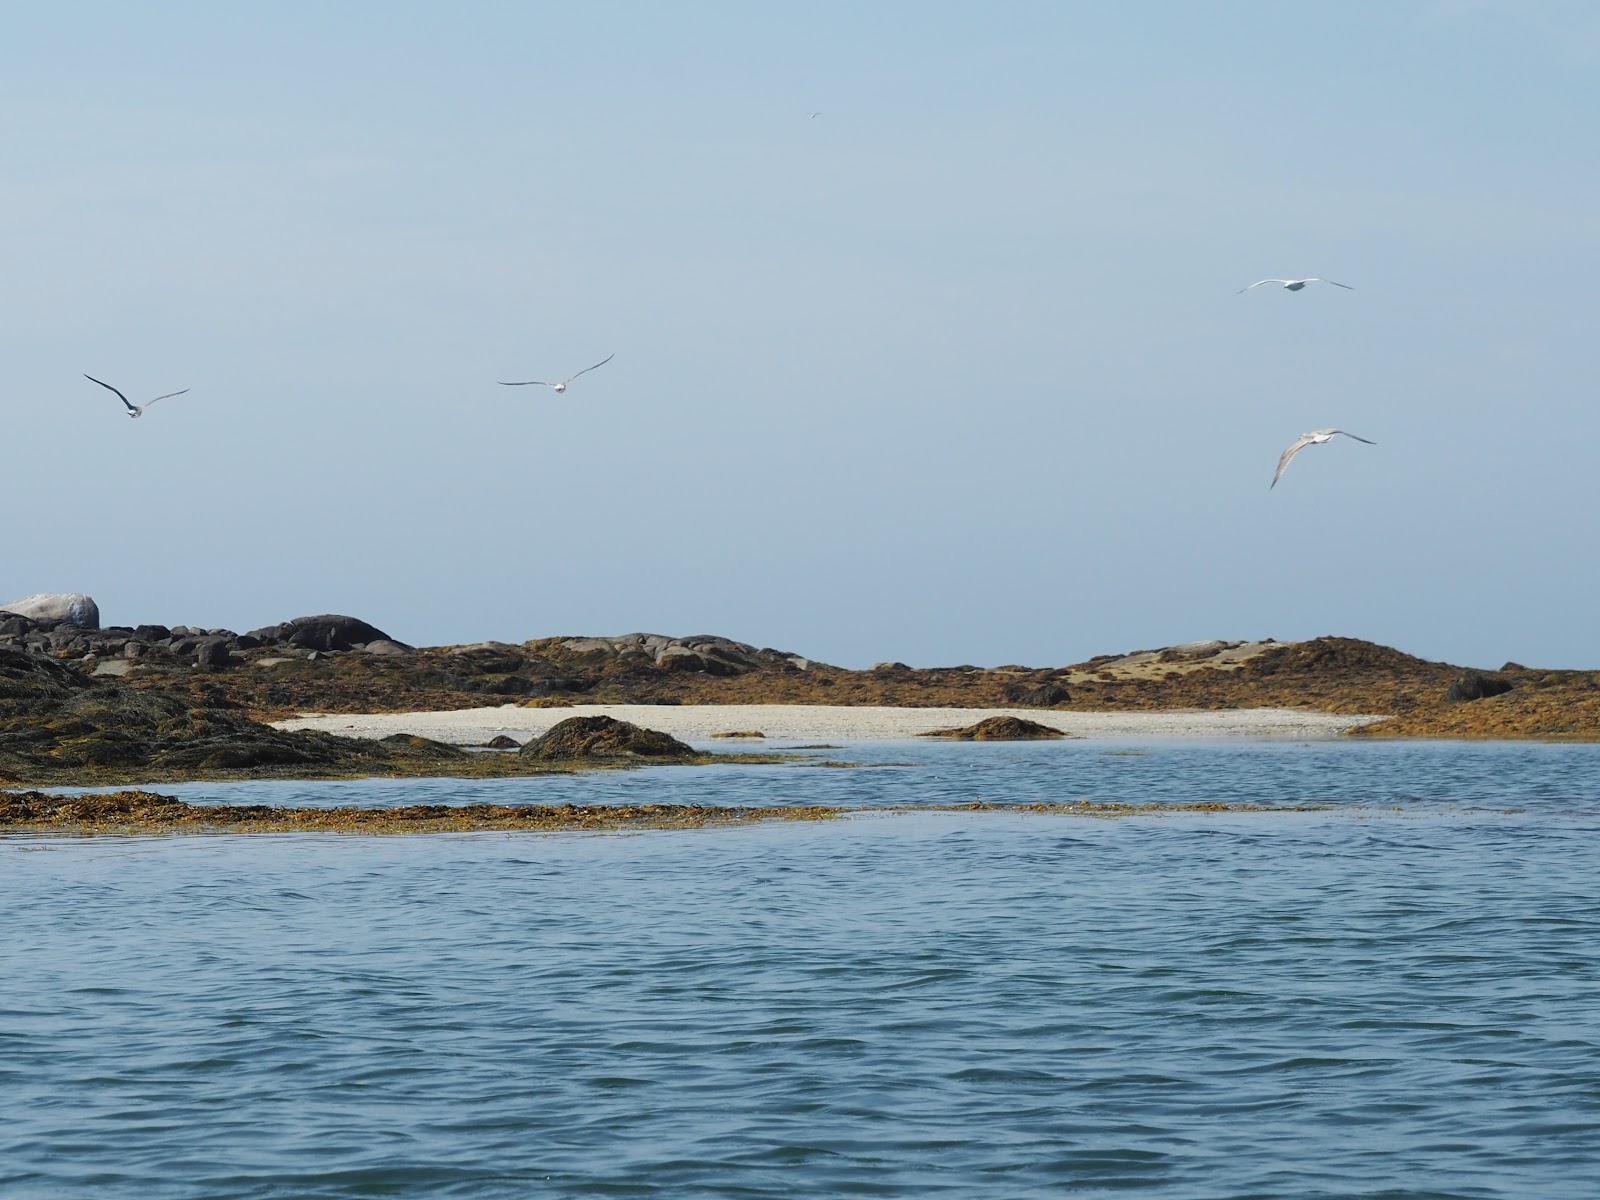
Last but not least, the boat is very quiet.  The long sleek shape makes very little wake.  Also the resilient plastic skin is very quiet, no slapping or spanking as it goes through the water.  Perfect for gliding up on wildlife to take photographs.


I've put enough time in to get a feel for how she balances.  Meaning I am able to pull out the camera and take pictures without feeling like I'll go over.  She will never be a rock solid barge, for sure, but I can work with this.


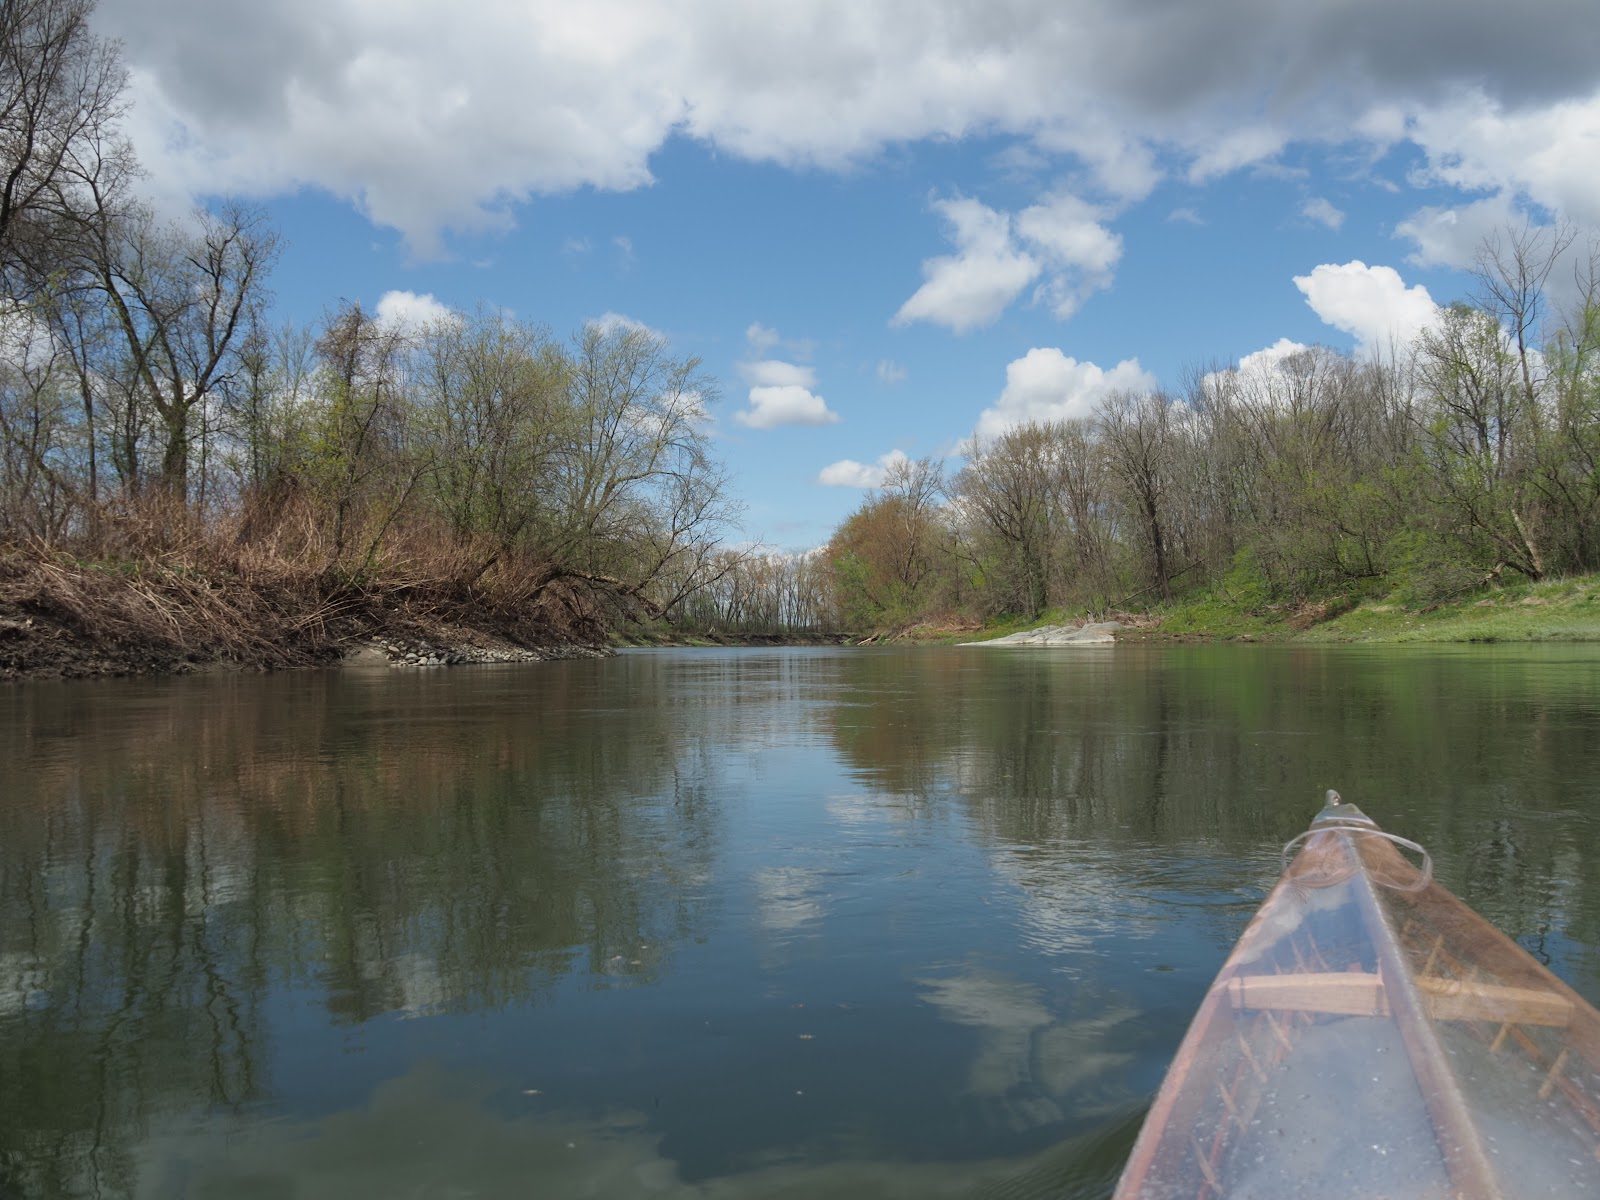
The shallow draft lets me slide into places most boats have trouble with.


Sure, it's a fast open-ocean boat.  But it's kinda fun to keep following the water until you're getting branches and seeds on the deck...


I have had a great season.  Now the snow's falling on the ski hills and it's time to switch over to winter sports.  

Until Spring!!


Tuesday, July 4, 2017

Finishing the baidarka!!!

The last step is putting on the skin.  Ordinarily one skins a kayak with cloth and then paints it.  However, I have seen photos online of boats skinned with clear plastic and they look amazing.  So I decided to give that a try.

The skin should be durable and hold up in the sun.  Eventually I found that www.MarineVinylFabric.com has heavy-duty 40 gauge marine vinyl intended for the windows of soft-tops for boats.  It is UV resistant and extremely clear.  Perfect.  Now, how much do I need?


The skin will be in three pieces, a deck and two sides of the hull.  The deck and sides will overlap on the gunwales.  The bottom of the sides will overlap on the keel.  Some quality time with a tape measure gets me accurate dimensions for the pieces.  I order a roll and it comes promptly.

I try to lay the pieces out directly on the vinyl but that turns out to be very difficult and I'm worried about any errors forcing me to scrap the entire skin and start over.  


So I get an inexpensive tarp, lay out the pieces on it, and cut templates from that.  I cut them a little oversize so I can tweak them if necessary.


And I am very glad that I did as both the bow and stern needed a bit of tweaking to drape nicely.


The basement is just long enough to unroll the vinyl on the unused half of the tarp.  I outline the templates with wet-erase white-board marker and start cutting.  That's a lot of heavy duty vinyl to cut. 


Whoops, almost forgot that I want lines inside the boat on the bow and stern to pull float-bags into the respective ends once the skin is on.  Gotta do that now.  (Float bags provide emergency flotation if the boat gets filled with water.) I drill a hole in both the bow and stern plates, lining it with copper so the string won't dig into the wood.  Then I put a string through that's long enough to reach back to the cockpit.  At the cockpit end I go around a rib and tie the ends together and add a loop.  Now I've got a continuous line that I can use to pull a float bag into the bow or (pulling the other side) pull it back out. 


The weather has turned hot, which is perfect.  I stretch the first side-piece and staple it to the keel with stainless steel staples.  The second piece is HH-66 cemented to the first piece.  HH-66 is a very effective contact cement used for bonding river raft seams. 


I tip the boat on its side to glue the deck onto the sides.  To hold it up I daisy chain spring clamps so they are heavy enough to counter the weight of the hanging vinyl.  Glad I have lots of spring clamps.


What a nice smooth deck.  Just needs a hole so I can get in!  


Some careful tracing around the inside of the cockpit coaming and then an additional 1 3/4 inches for overlap.  Finally, cross my fingers and cut out the hole with a sharp knife.


A heat gun softens the vinyl enough that I can stretch it up to the inside of the cockpit coaming.


When the vinyl cools, it holds its shape pretty well.  I am going to sew the skin onto the coaming.  Now I need to drill all the holes in the coaming to sew through.


A quick test with a scrap of wood and a scrap of vinyl shows that a 3/4 inch stitch length works well.  I pull as hard as I can and the vinyl doesn't tear.  Masking tape on the side of the coaming lets me put clearly visible dots and will help keep the surface from splitting as I drill.  Then a long session of drilling.   (Estimated roughly 100 holes.  You're welcome to count them).  


Vinyl is most likely to tear where there is a sharp corner.  Rather than poke a hole with a needle, I clamped the cockpit back onto the vinyl and drilled through the vinyl at each hole.  Then I sewed twice around with the artificial sinew (waxed nylon).  Finally, I folded the extra vinyl down over the stitch line and glued it.  This should both reinforce the sewn section and waterproof the holes where the stitches go through.

Note the support for the cockpit coaming is inside the skin and gets lashed to the coaming at the same time the skin is sewn on.

The final pass is gluing a 2 inch wide strip over the keel seam, both to ensure it is water tight and provide a layer of protection from rocks and such.


The skin is done!  

This is my first pass at working with vinyl but from this far back it does look rather nice.  It's never going to look this clean again!


Time to add the practical stuff to the deck.  Stainless D rings held with vinyl flaps will anchor bungee cords.  I'm worried that the vinyl piece will stretch so I incorporate a short piece of nylon string, unlayed at the ends so it will spread the load.  

The foredeck gets three rings on each side.  The end rings are angled in (the butterfly shapes) and the center ones are straight (the bow-tie shapes).


The glue develops its full strength in 24 hours.  The next day I put on the bungees.


The final step is adding paddle loops at bow and stern.  These allow me to secure a paddle on the deck with one end through the lope and the other under the bungee cords by the cockpit.  The vinyl is soft, especially when it gets warm, so I needed something to stiffen the loop, keeping it standing up so I could slide a paddle under it.  Win came to the rescue with two lengths of plastic stay material meant to stiffen clothing.  Works well on vinyl too!


This is how the bungees and paddle loop look in use.


I found that Sealine (maker of Seals spray skirts) will make custom spray skirts.  Their instructions are simple: trace the cockpit and indicate where the tunnel should be.  Then order through a local retailer (REI in my case).  I've sent the order off.  It'll be a month or so before I get the spray skirt. Luckily this is a very dry boat (high sided and sloped decks that shed water).  So for now I'll paddle it as a high performance recreational kayak.  


I'll wait till I have the spray skirt to find out how it rolls and to take it out in big breaking waves.

I've taken the baidarka out three times so far, in local flat water and on the ocean.  It feels the exact opposite of my Greenland boat (below).

My old boat - a Greenland kayak


The baidarka cockpit feels like sitting in a bathtub, especially compared to the low volume Greenland cockpit I am used to.  The baidarka's deck is about 2 inches wider too.  The height of the deck and the deck's slope combine to shed water so waves that would soak me in the Greenland boat just slide off and I stay totally dry.

I've had no problem paddling without a spray skirt even in moderate waves.  The high deck may make it a real challenge to roll though.

I am higher off the water than in my Greenland boat and need a longer paddle.  Aleutian paddles are typically longer than Greenland ones, now I see why.


I had one big problem - I could not figure out how to get in and out without a flat back-deck to put the paddle across for stability!  If I put the paddle across the cockpit the blade doesn't leave me enough room to get in.  If I don't put the paddle across the cockpit then I fall over!  Finally I created a little horizontal "landing pad" behind the cockpit that's tied to the bungee D-rings.  (you can see it behind the cockpit in the beach picture, above).  It's not pretty, but it works.

The long slim hull is fast.  I'm sure the smoothness of the vinyl helps there too.  For the same effort, this boat is going about half a mile an hour faster than my Greenland boat.  Since the baidarka's waterline length is 19 feet and the Greenland boat's waterline length is 17 feet, that's just about right. The theoretical hull speed in miles per hour is 1.5 * square root of the waterline length.  For my Greenland boat that is 6.1 mph.  For the baidarka that is 6.5 mph.

The baidarka's V-shaped hull is very tippy initially but then seems to be rock solid stable once it is leaned over.  My Greenland boat is fairly stable on its flat bottom, but if you start to lean, it has no secondary stability at all.  It just goes right over (and comes back up the other side).

I'm still working on developing my balance in this boat.  The first long trip was a learning experience. Initially I had an inch-thick foam seat pad.  Taking that out dropped my weight down and helped tremendously with stability.  I worried how the stability would be in waves but was pleasantly surprised to find that it feels about the same as my Greenland boat (except dry, completely dry!!)

In strong wind the boat has a rather strong weather helm.  Perhaps I moved the cockpit too far forward.  If I re-skin the boat (not for a long time, I hope!) I'll move it back six inches and see how that feels.


I've named the baidarka the "Osprey".  I think it is a fitting name for a boat that flies low and fast over the water.


I'm looking forward to many trips in this boat.